Adb drivers: universal usb drivers for all android devices
Содержание:
- Инструкция: Как применить патч к системному текстовому файлу с помощью ADB Run
- Fourth Step: Open Device Manager and Install the ADB Driver
- Step 2: Remove Bad ADB Drivers
- Install Universal ADB drivers
- Features of Universal ADB Driver
- How do I install ADB?
- Setup ADB and Fastboot on Windows and Mac OS:
- Third Step: Activate USB Debugging on your Android Device
- Android ADB Interface для Windows 7 x64, Windows XP x64, ,
- How to Install ADB and Fastboot Tool:
- How to Install Google USB Drivers:
- Features of Universal ADB Drivers
- Importance of ADB and Fastboot Mode
- Step 3: Install the Universal Driver
- Steps to install Minimal ADB and Fastboot
- How to install ADB Drivers on Windows OS
- What is ADB and Fastboot?
- What is ADB?
Инструкция: Как применить патч к системному текстовому файлу с помощью ADB Run
Многие знают, что операционная система Android является самой гибкой в плане настроек, кастомизации и модинга, что позволяет профессионалам и любителям создавать не только собственные прошивки, основываясь на официальные, но и заниматься созданием патчей, которые в той или иной мере влияют на работу системы/отдельно взятых компонентов вашего устройства.
Сегодня мы рассмотрим пример того, как можно скопировать системный текстовый файл на примере build.prop из ОС Android к себе на компьютер, отредактировать его и после создать патч, который можно спокойно применить к вашему устройству, а при необходимости совершить откат совершенных действий.
Что нам понадобится для работы
- ПК или ноутбук на ОС Windows
- USB-кабель для вашего устройства (желательно фирменный)
- Скачанная и установленная программа ADB Run на ваш компьютер
- Включенная отладка по USB на Android
- Наличие Root-прав
- Установленная программа BusyBox на Android
Процесс создания и применения патча
Сначала мы должны подключить устройство к ПК через USB-кабель, затем запустить программу ADB Run и перейти в меню Manual Command and Unlock Bootloader->ADB, подробную инструкцию о том, как пользоваться ADB Run вы сможете найти в самом начале обзора программы.
Теперь нам необходимо скопировать файл build.prop, для чего вводим следующем команду в открывшемся окошке программы:
После проделанных действий файл build.prop будет скопирован на рабочий стол вашего ПК, откуда вы сможете открыть его и отредактировать, но не забудьте изменить имя файла. Как только файл будет отредактирован и сохранен, вам нужно будет обратно скопировать его на устройство, для чего мы воспользуемся следующей командой.
Данная команда позволила нам переместить текстовый файл на карту памяти устройства, а следующим шагом является перемещение его в системную папку, но прежде чем вы начнете это делать, необходимо указать файлу разрешения на запись. Для этого в разделе system необходимо прописать следующие команды:
После проделанных действий, можно смело отправлять созданный нами файл в системный раздел, введя следующую команду:
Теперь нам останется создать сам патч. Для этого нужно перейти в системный раздел командой:
А при помощи следующей команды создать сам матч:
В этот момент произойдет создание файла с именем ptch.diff в который и будут внесены наши изменения.
Последнее, что нужно сделать – это применить патч, который мы только, что создали, а для этого служит очень простая команда:
На этот процесс создания и применения патча к текстовому системному файлу можно считать завершенным.
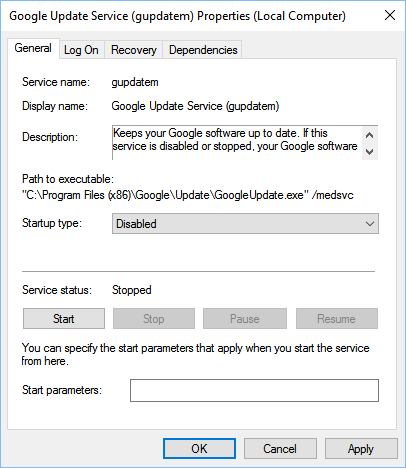
Fourth Step: Open Device Manager and Install the ADB Driver
You can open Device Manager to install the ADB driver. In this article, we are going to use Google Nexus 7 because the steps are quite similar for all other Android devices. Once you’re ready, just follow the instructions below:
- Plug your Android device into your computer.
- Open the Run dialog box by pressing Windows Key+R on your keyboard.
- Type “devmgmt.msc” (no quotes), then hit Enter. This should bring up Device Manager.
- Look for your Android device.
- Right-click it, then select Properties from the options. If the driver is not installed properly, you will see a yellow warning icon beside your Android device.
- Go to the Driver tab, then click Update Driver.
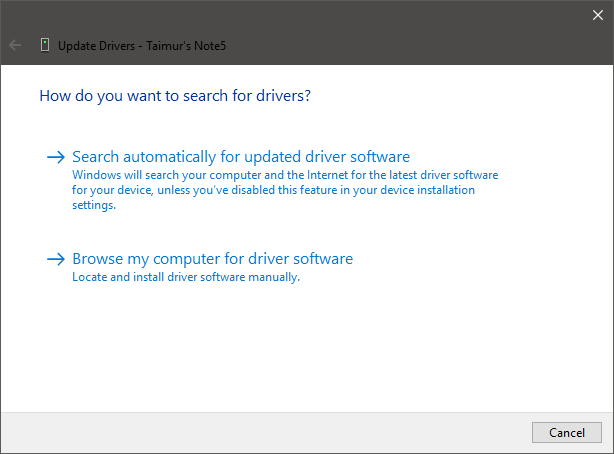
- A new window will pop up. Select the ‘Browse my computer for driver software’ option.
- Search for the ADB driver file you previously downloaded by clicking Browse.
- Select the box beside Include Subfolders, then click Next. Device Manager will automatically install the ADB driver.
If you do not need this feature, you might ask, “Where can I uninstall the ADB driver?” You can do that via Device Manager. You just need to follow the first four steps, then select Uninstall Device.
Resolve PC Issues with Driver Updater
Unstable PC performance is often caused by outdated or corrupt drivers. Auslogics Driver Updater diagnoses driver issues and lets you update old drivers all at once or one at a time to get your PC running smoother
Auslogics Driver Updater is a product of Auslogics, certified Microsoft Silver Application Developer
DOWNLOAD NOW
So, if you do not have the patience and tech skills to manually update your drivers, we recommend that you use Auslogics Driver Updater. Once you activate this program, it will automatically identify what system version you have. That said, Auslogics Driver Updater will locate the latest manufacturer-recommended drivers that are compatible with your system.
Where do you plan on using the ADB?
Step 2: Remove Bad ADB Drivers
The Nirsoft USBDeview utility comes as a zipped executable. That means you must unzip it and it doesn’t require installation. This utility may show up as malware in a virus scan, but rest assured that it’s safe.
After unzipping the file, open the extracted folder and run the executable utility inside it. USBDeview displays the total number of installed USB drivers on your computer, both connected and disconnected.
Look for the colored status indicator at the far-left of the USBDeview window. There are four colors. Each represents a different status:
- Green indicates that the device is connected and that it functions properly.
- Pink means the device can unplug and works properly (although in reality, it may not actually work properly).
- Red indicates a disabled USB device.
- Gray means the device is installed, but not connected.
Now, remove all gray items with the words «Google», «Linux», «ADB», or «Android» in the title. When troubleshooting this issue, we typically remove every item that’s not green.
Removing a device driver means that you’ll need to reinstall drives for that USB device if you want to use it again. Fortunately, most of the time Windows automatically installs USB devices, so it’s not a big deal.
Install Universal ADB drivers
ADB (Android Debug Bridge) is the source or software package to make your computer enable to detect the third party storages. Though MTP (Media transfer protocol) can help you in this regard but ADB got more control and performances.
There are two ways to get the drivers installed on your computer.
Either you get the driver from the given download link what we have given to you, and install simply, though we can guide you to go through the installation simply.
The other way is a long way to go a process, and you need to get the patience to go with this.
In this, you need to have a driver updater, which will scan the entire computer, and will update you regarding the missing driver, and with the option to update them you simply get them updates.
Also Check: Kingroot Application APK
The first was better and simpler….!
Go to the download folders in your computer, or where you have stored the ADB drivers.
The file will be in the zip, unzip the file and get the setup file
Click on the setup file, and install it on your computer.
You have nothing to worry related to installation, just click on the file and follow the screen commands to get it going.
Now, restart your computer to save the changes what you have just made.
Universal ADB drivers help you in many ways.
Like if you need to communicate with the mobile phone, this helps you. By getting the drivers installed you can share files, sync the data between the computer and the phone and much more.
Features of Universal ADB Driver
Quick Installer
It allows you to quickly install the Google ADB Driver in few seconds only. Simply connect the device to the computer and run the Universal ADB Driver Setup and follow the screen instructions.
Supports every Device
It supports almost every Android Device, whether it is from Major brands like Samsung, HTC, Sony or from Minor brands. It automatically detects the chipset of your device and install the driver accordingly.
Detects Manufacturer & Model
It automatically detects the Manufacturer name and Model Number of your Device and shows it under the Manufacturer and Description List.
Refresh Button
It allows you to quickly refresh the device list that is attached to the computer. This feature is introduced in version 2.0 and is not available in version 1.0.
Supports Windows x86 and x64 Bit
It automatically detects the BITs of you computer and allows you to install the ADB Driver on Windows XP, Vista, Windows 7, Windows 8, Windows 8.1 and Windows 10 easily.
How do I install ADB?
Phone Setup
- Launch the Settings application on your phone.
- Tap the About Phone option generally near the bottom of the list (this is hidden behind the “System” option in Google’s latest Android Oreo version).
- Then tap the Build Number option 7 times to enable Developer Mode. You will see a toast message when it is done.
- Now go back to the main Settings screen and you should see a new Developer Options menu you can access.
- Go in there and enable the USB Debugging option.
- You are partially done with the phone setup process. Next up, you will need to scroll below and follow the rest of the instructions for your particular operating system.
Microsoft Windows ADB Setup
- Download the ADB ZIP file for Windows
- Extract the contents of this ZIP file into an easily accessible folder (such as C:\adb)
- Open Windows Explorer and browse to where you extracted the contents of this ZIP file
- Then open up a Command Prompt from the same directory as this ADB binary. This can be done by holding Shift and Right-clicking within the folder then click the “open command prompt here” option. (Some Windows 10 users may see “PowerShell” instead of “command prompt”.)
- Connect your smartphone or tablet to your computer with a USB cable. Change the USB mode to “file transfer (MTP)” mode. Some OEMs may or may not require this, but it’s best to just leave it in this mode for general compatibility.
- In the Command Prompt window, enter the following command to launch the ADB daemon:
- On your phone’s screen, you should see a prompt to allow or deny USB Debugging access. Naturally, you will want to grant USB Debugging access when prompted (and tap the always allow check box if you never want to see that prompt again).
- Finally, re-enter the command from step #6. If everything was successful, you should now see your device’s serial number in the command prompt. Yay! You can now run any ADB command on your device! Now go forth and start modding your phone by following our extensive list of tutorials!
How to Install ADB on macOS
- Download the ADB ZIP file for macOS
- Extract the ZIP to an easily accessible location (like the Desktop for example).
- Open Terminal.
- To browse to the folder you extracted ADB into, enter the following command:
- For example, on my Mac it was this:
- Connect your device to your Mac with a compatible USB cable. Change the USB connection mode to “file transfer (MTP)” mode. This is not always required for every device, but it’s best to just leave it in this mode so you don’t run into any issues.
- Once the Terminal is in the same folder your ADB tools are in, you can execute the following command to launch the ADB daemon:
- On your device, you’ll see an “Allow USB debugging” prompt. Allow the connection.
- Finally, re-enter the command from step #7. If everything was successful, you should now see your device’s serial number in macOS’s Terminal window. Congratulations! You can now run any ADB command on your device! Now go forth and start modding your phone by following our extensive list of tutorials!
How to Install ADB on Linux
- Download the ADB ZIP file for Linux
- Extract the ZIP to an easily accessible location (like the Desktop for example).
- Open a Terminal window.
- Enter the following command:
- This will change the directory to where you extracted the ADB files.
- So for example:
- Connect your device to your Linux machine with your USB cable. Change the connection mode to “file transfer (MTP)” mode. This is not always necessary for every device, but it’s recommended so you don’t run into any issues.
- Once the Terminal is in the same folder your ADB tools are in, you can execute the following command to launch the ADB daemon:
- Back on your smartphone or tablet device, you’ll see a prompt asking you to allow USB debugging. Go ahead and grant it.
- Finally, re-enter the command from step #8. If everything was successful, you should now see your device’s serial number in the Terminal window output. Congrats! You can now run any ADB command on your device! Now go forth and start modding your phone by following our extensive list of tutorials!
Some Linux users should be aware that there can be an easier way to install ADB on their computer. The guide above will certainly work for you, but those own a Debian or Fedora/SUSE-based distro of Linux can skip steps 1 and 2 of the guide above and use one of the following commands…
- Debian-based Linux users can type the following command to install ADB:
- Fedora/SUSE-based Linux users can type the following command to install ADB:
Recommended reading: How to Use ADB or Fastboot From Any Directory on your Windows/Linux PC, How to quickly setup and use ADB
Setup ADB and Fastboot on Windows and Mac OS:
Setting up ADB and Fastboot seems quite easy. As ADB and Fastboot both are a part of the Android SDK package, only you to download the kit (which is over 500 MB) and then set up path variables, or the below-written methods can be used to install ADB and fastboot driver on Windows and Mac OS. But first, you need to remember that you have to put your device into USB debugging mode, but before that, you need to enable the developer option. If you just ignore this step, the possibility is your PC won’t recognize your device.

Did you know?
We also have a separate guide on how to install ADB and Fastboot on macOS and Linux
Third Step: Activate USB Debugging on your Android Device
Once you’ve downloaded the ADB driver file, you must enable the USB Debugging function on your Android device. You can only enjoy the full potential of the ADB when the USB debugging function is activated. Here are the steps:
- Open Settings on your Android device.
- Scroll down, then tap About Phone or About.
- Enable the Developer options by tapping the Build number seven times.
- Remember to set the toggle at the top to On.
- Enable USB Debugging.
- Plug your Android device into your computer. On your Android device, you will see a message saying, “Allow USB Debugging?” Select the box beside the ‘Always allow from this computer’ option, then tap OK.
Android ADB Interface для Windows 7 x64, Windows XP x64, ,
|
ADB Testing Interface |
MOD_ENUM_HP_VBUS |
|
Android ADB Interface |
MOD_ENUM_VBUS |
|
Android Bootloader Interface |
MODHP_ENUM_VBUS |
|
Android Composite ADB Interface |
SCFILTER\CID_8031E073FE2111633F011183079000 |
|
Android Composite ADB Interface (Google USB ID) |
USBCDCACM\VID_03F0&PID_931D&SUBCLASS_05&PROT_01 |
|
Android Composite ADB Interface (Qualcomm USB ID) |
USBCDCACM\VID_03F0&PID_931D&SUBCLASS_05&PROT_02 |
|
Android Huawei Mobile ADB Interface |
USBCDCACM\VID_03F0&PID_931D&SUBCLASS_05&PROT_03 |
|
Android NexusOne ADB Interface |
USBCDCACM\VID_03F0&PID_931D&SUBCLASS_05&PROT_05 |
|
Enumerator Device |
USBCDCACM\VID_03F0&PID_931D&SUBCLASS_05&PROT_10 |
|
Generic Smart Card |
USBCDCACM\VID_03F0&PID_931D&SUBCLASS_05&PROT_12 |
|
HP GNSS Sensor |
USBCDCACM\VID_03F0&PID_931D&SUBCLASS_05&PROT_13 |
|
HP lt4110 LTE/HSPA+ 4G Module Application |
USBCDCACM\VID_03F0&PID_931D&SUBCLASS_05&PROT_14 |
|
HP lt4110 LTE_HSPA+ 4G Module Modem |
USBCDCACM\VID_03F0&PID_9A1D&SUBCLASS_05&PROT_01 |
|
HP lt4110 LTE/HSPA+ 4G Module Network Device |
USBCDCACM\VID_03F0&PID_9A1D&SUBCLASS_05&PROT_02 |
|
HP lt4110 LTE/HSPA+ 4G Module Network Device -Control |
USBCDCACM\VID_03F0&PID_9A1D&SUBCLASS_05&PROT_03 |
|
HP lt4110 LTE/HSPA+ 4G Module NMEA |
USBCDCACM\VID_03F0&PID_9A1D&SUBCLASS_05&PROT_05 |
|
HP lt4110 LTE/HSPA+ 4G Module PC UI |
USBCDCACM\VID_03F0&PID_9A1D&SUBCLASS_05&PROT_10 |
|
HP lt4110 LTE/HSPA+ 4G USB Enumerator Device |
USBCDCACM\VID_03F0&PID_9A1D&SUBCLASS_05&PROT_12 |
|
HP lt4114 LTE 4G Module Application |
USBCDCACM\VID_03F0&PID_9A1D&SUBCLASS_05&PROT_13 |
|
HP lt4114 LTE 4G Module Modem |
USBCDCACM\VID_03F0&PID_9A1D&SUBCLASS_05&PROT_14 |
|
HP lt4114 LTE 4G Module Network Device |
USBCDCACM\VID_12D1&PID_15E5&MI_01 |
|
HP lt4114 LTE 4G Module Network Device -Control |
USBCDCACM\VID_12D1&PID_15E5&MI_02 |
|
HP lt4114 LTE 4G Module NMEA |
USBCDCACM\VID_12D1&PID_15E5&MI_03 |
|
HP lt4114 LTE 4G Module PC UI |
USBCDCACM\VID_12D1&SUBCLASS_05&PROT_01 |
|
HP lt4114 LTE 4G USB Enumerator Device |
USBCDCACM\VID_12D1&SUBCLASS_05&PROT_02 |
|
HP Mobile Broadband USB Bus Enumerated Device |
USBCDCACM\VID_12D1&SUBCLASS_05&PROT_03 |
|
HUAWEI Enumerator Device |
USBCDCACM\VID_12D1&SUBCLASS_05&PROT_05 |
|
HUAWEI GNSS Sensor |
USBCDCACM\VID_12D1&SUBCLASS_05&PROT_06 |
|
HUAWEI Mobile Broadband — SerialA |
USBCDCACM\VID_12D1&SUBCLASS_05&PROT_0A |
|
HUAWEI Mobile Broadband — SerialB |
USBCDCACM\VID_12D1&SUBCLASS_05&PROT_0B |
|
HUAWEI Mobile Broadband — SerialC |
USBCDCACM\VID_12D1&SUBCLASS_05&PROT_0E |
|
HUAWEI Mobile Broadband — ShellA |
USBCDCACM\VID_12D1&SUBCLASS_05&PROT_10 |
|
HUAWEI Mobile Broadband — ShellB |
USBCDCACM\VID_12D1&SUBCLASS_05&PROT_12 |
|
HUAWEI Mobile Connect — 3G Application Interface |
USBCDCACM\VID_12D1&SUBCLASS_05&PROT_13 |
|
HUAWEI Mobile Connect — 3G GPS Interface |
USBCDCACM\VID_12D1&SUBCLASS_05&PROT_14 |
|
HUAWEI Mobile Connect — 3G Modem |
USBCDCACM\VID_12D1&SUBCLASS_05&PROT_15 |
|
HUAWEI Mobile Connect — 3G Network Card |
USBCDCACM\VID_12D1&SUBCLASS_05&PROT_18 |
|
HUAWEI Mobile Connect — 3G PC UI Interface |
USBCDCACM\VID_12D1&SUBCLASS_05&PROT_19 |
|
HUAWEI Mobile Connect — 3G PC Voice Interface |
USBCDCACM\VID_12D1&SUBCLASS_05&PROT_1A |
|
HUAWEI Mobile Connect — Application Interface |
USBCDCACM\VID_12D1&SUBCLASS_05&PROT_1B |
|
HUAWEI Mobile Connect — Bluetooth Interface |
USBCDCACM\VID_12D1&SUBCLASS_05&PROT_1C |
|
HUAWEI Mobile Connect — Control Interface |
USBCDCACM\VID_12D1&SUBCLASS_05&PROT_61 |
|
HUAWEI Mobile Connect — Extra Control Device |
USBCDCACM\VID_12D1&SUBCLASS_05&PROT_62 |
|
HUAWEI Mobile Connect — Fingerprint Interface |
USBCDCACM\VID_12D1&SUBCLASS_05&PROT_63 |
|
HUAWEI Mobile Connect — GPS Interface |
USBCDCACM\VID_12D1&SUBCLASS_05&PROT_65 |
|
HUAWEI Mobile Connect — Modem |
USBCDCACM\VID_12D1&SUBCLASS_05&PROT_66 |
|
HUAWEI Mobile Connect — Network Adapter |
USBCDCACM\VID_12D1&SUBCLASS_05&PROT_6A |
|
HUAWEI Mobile Connect — Network Card |
USBCDCACM\VID_12D1&SUBCLASS_05&PROT_6B |
|
HUAWEI Mobile Connect — PC UI Interface |
USBCDCACM\VID_12D1&SUBCLASS_05&PROT_6E |
|
HUAWEI Mobile Connect — PC Voice Interface |
USBCDCACM\VID_12D1&SUBCLASS_05&PROT_78 |
How to Install ADB and Fastboot Tool:
As we were given 3 different ADB and Fastboot tools, you can download and install either 15 seconds ADB Installer, Minimal ADB and Fastboot tool or SDK Platform tool. Well, we recommend using the Minimal ADB and Fastboot tool or the official Android SDK Platform tool.
Install 15 seconds ADB Installer
1) Starting with let’s download the ADB Installer setup file by XDA member @Snoop05. It does not just install ADB but it also installs fastboot and USB drivers within a short span of 15 seconds. 2) First of all, run the adb-setup.exe.

3) Now you need to respond with YES (Y) or NO (N). Type ‘Y’ if you want to install the ADB and fastboot driver.
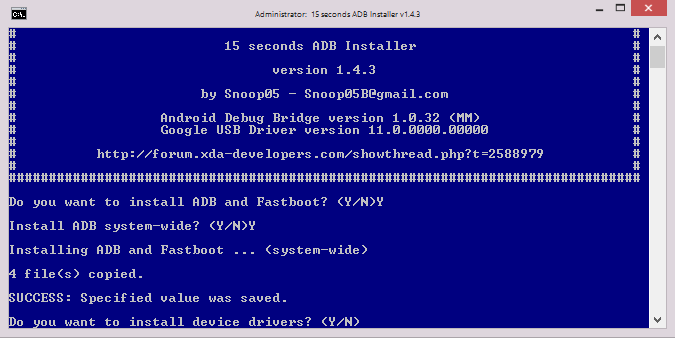
4) Once again type ‘Y’ to install the device driver. This may take a few seconds to install the device drivers and after that, the command window will automatically close.
6) Congratulations!!! You have successfully installed ADB and fastboot on your Windows PC.
Install Minimal ADB and Fastboot:
- Download the Minimal ADB and Fastboot Tool exe installer package
- Start the installation by double-clicking it
- If a new window pops up to grant the permission, confirm by YES or Run.
-
Click the Next button to confirm one by one.
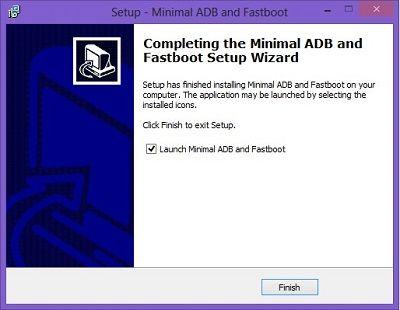
- Now tap on Finish to complete the process.
- If you have already selected the tick mark to launch minimal ADB and fastboot
- You will see this screen to start the command
Here are all basic adb and fastboot commands so that you should learn to become Android Pro.
How to Install Google USB Drivers:
This is an additional but important procedure you need to follow in order to use Fastboot and ADB properly with Google Nexus / Pixel and other Android devices. The process below shows how to install Google USB drivers on your computer.
Step 1 – Download Google USB Drivers Package. Extract it to a location easy to remember. You can also download it from the direct link below:
Download Google USB Driver: latest_usb_driver_windows.zip
Step 2 – Connect your Android device to your computer with a USB cable.
Step 3 – From Windows Explorer, open Computer Management.

Step 4 – In the Computer Management left pane, select Device Manager.
Step 5 – In the Device Manager right pane, locate and expand Portable Devices.
Step 6 – In Portable Devices, right-click the name of the device you connected (as highlighted below), and then select Update Driver Software.

Step 7 – In the Hardware Update wizard, select Browse my computer for driver software and click Next.
Step 8 – Click Browse and then locate the USB driver folder. It would be where you extracted the downloaded package in Step 1.
Step 9 – Click Next to install the driver.
For any problems or queries, please write to us in the comments and we will get back to you soon.
Features of Universal ADB Drivers
- This is the driver which can simply create a bridge between a computer and a phone. By using that bridge anyone can access the files on the computer and vice versa. via
- ADB drivers are quick installer file, you just grab the setup file and it will get you installed the right package of software to communicate with the computer.
- It supports almost all Android devices and Android versions plus USB drives. It will automatically detect the drives without any hiccup
- It detects the manufacturer model, provides you with the basic info regarding the phone, description, RAM, ROM information and much more.
- You can sync your phone with the computer, and get same data on both sides of the data cable.
- You can flash your Android phone; install Stock ROM, Custom ROM without any turbulence
- Share the internet connection to your computer by using a simple data cable.
- It simply detects the BITs of your computer, and installs the Universal ADB drivers accordingly on Windows XP, Windows 7, Windows 8 and Windows 10
Download Universal ADB drivers from the given download link, and install them on your Windows computers.
Importance of ADB and Fastboot Mode
If you have just stepped into the world of Android ecosystem then the ADB and Fastboot binaries are probably among the top few things that you should get yourself aware of. If your sole purpose of using an Android device is just making calls and sending messages, well then you probably wouldn’t need these drivers. But the thing is there is only a limited chunk of users who belong to this population. For the vast majority, they wish to explore the full potential of this open-source environment.
The usefulness of ADB Commands
In this regard, right from the first step, you will be needing ADB and Fastboot. To begin with, the ADB commands are used to boot your device to different modes, including Fastboot Bootloader and Downloader and Stock Recovery. Similarly, you could even install and uninstall any application onto your device right from your PC itself. Likewise, these ADB commands also allow you to transfer files between your device and PC. Then using the adb shell you could unlock the device’s full potential with so many hidden tweaks.
The Need for Fastboot Commands
Talking about tweaks, let’s turn our attention towards Fastboot. To be able to effectively carry out any of the system-level tweaks on to your device, the first step is to bypass the restriction put in place by the OEM. In simpler words, an unlocked bootloader is a major prerequisite that your device should qualify. And that could only be done via the required fastboot commands. After that, the plenty of goodies that an unlocked bootloader brings in with itself also requires the support of these Fastboot commands in some form or the other.

TWRP Home
Flashing a Magisk patched image for root, permanent installation of TWRP ZIP, or just booting its IMG file for one-time use, all ask for appropriate fastboot commands. Likewise, the plethora of mods that you come across requires sending in the fastboot commands. Even keeping everything else aside, just the fact that fastboot is required to unlock the bootloader, root your device and flash TWRP should be enough to highlight its importance.
So go ahead and install the necessary Android SDK Platform Tools on your PC. Then launch the Command Prompt or PowerShell window and welcome the endless possibilities on your Android device. Just keep in mind to enable USB Debugging on your device from Developer Options if you are dealing with Android Debug Bridge, and have the necessary drivers installed on your PC.
Advantages of ADB and Fastboot tool
- Compatible for any Android devices
- Runs on both Windows or Mac platforms
- Install Custom ROM
- Flash Custom Recovery
- Can install Root
- Unlock / Relock the device bootloader
- Remove bloatware from your phone
Step 3: Install the Universal Driver
Koush’s Universal ADB Driver works for every Android device, no matter how niche. After installing it, you should be able to assign the right driver to your phone.
Manually Install a USB ADB Driver
To do a manual install, first run the executable package for Koush’s Universal ABD Driver you downloaded earlier, which installs the driver to your computer.
Second, plug your Android device into your PC via USB. The correct USB drivers should load. You can check by going to Device Manager in Windows as discussed earlier. If there is a different driver listed than what you saw in the first step, chances are you have the correct USB driver loaded now.
In the Device Manager, locate the new ADB/USB driver. This will likely be under your phone’s name in the Portable Devices section, but Android devices can appear in different locations in Device Manager. You may need to check each possible device class (such as Android Phone or Samsung) in the Device Manager before you find yours.
If you can’t find it, sometimes you’ll need to check the notification shade on your Android device for additional steps. This allows you to authorize a specific computer to connect to your device beyond charging purposes.
Once you find it, right-click on your device and choose Update Driver. From the resulting menu, choose Browse my computer for driver software, then Let me pick from a list of device drivers on my computer.
Here, you will see a list of compatible drivers. Choose one of these (starting at the top if fine). If it fails, repeat the process by going down the list to locate another driver that works.
Install the Universal ABD Driver Instead
If you can’t get the right driver installed using the above method, you will need to perform a manual installation in order for Koush’s driver to work. Thankfully, the Device Manager lets you hand-pick a driver from your computer instead of browsing from a list.
Instead of selecting Let me pick from a list of device drivers on my computer in the previous step, hit the Browse button and manually find the directory where you installed Koush’s drivers.
The location in File Explorer should be something like this:
You may need to search for the folder if you don’t see it there. Once you select the right location, hit Next and Windows will install the drivers. From now on, whenever you connect your Android device with ADB enabled, Koush’s drivers will load in place of the ones that failed to work.
Finally, restart your computer and attempt to connect over ADB again. You should have success at this point.
Steps to install Minimal ADB and Fastboot
- Download and extract the zip file on your computer.
- Right-click and Run it as Administrator.
- As you launch it, the ADB and Fastboot Setup wizard will popup.
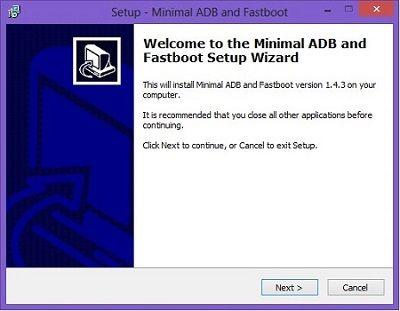
- Note: It is recommended to close all other applications before continuing.
- Furthermore, click Next to continue.
- Disclaimer mentioning that only you’ll be responsible for any modifications or damage will appear.
- Read it out and click Next.
- Browse and select a destination folder for installing the ADB drivers. Then click on the Next option.

- Note: Only 3.4 MB of free disk space is required.
- Select a destination folder to place the program shortcuts.
- Then click on the Next option.
- Moreover, if you want, you can create a desktop icon to easily access the ADB drivers.
- Or skip it and click on Next.
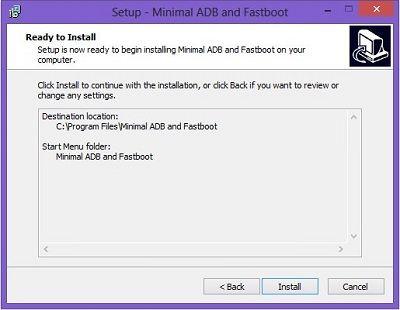
- Finally, you can click on the Install option to start the installation process.
- Or you can go back to review or change the settings.
- As soon as you click on Install, the Minimal ADB installation process will start.
- Finally, Minimal ADB drivers will be successfully installed on your computer.
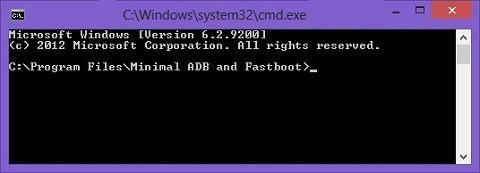
- Moreover, click on finish to launch the ADB and Fastboot window as given below.
- When you click finish, the command window (cmd) will open.
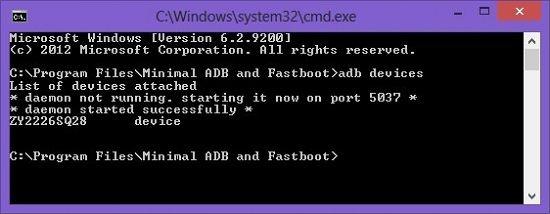
Furthermore, to verify that ADB drivers are installed or not, type the following command and press enter key:
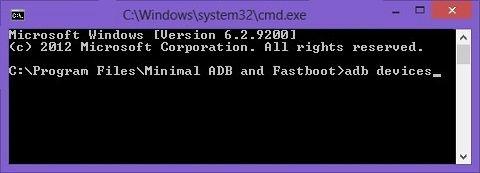
As soon as you press enter key, you’ll see a message saying ‘List of devices attached’ along with some random numbers. This will confirm the successful connection of your Android device with a computer using ADB drivers.
How to install ADB Drivers on Windows OS
Follow the instructions given below to manually install ADB and Fastboot drivers on Windows XP, Windows Vista, Windows 7, Windows 8/8.1, Windows 10 32-bit, or 64-bit operating system. If you face any problem, then confirm the latest mobile drivers are installed on your computer or not.
Requirements
- Ensure to connect your Android device to PC via USB cable.
- Also enable USB debugging mode on your phone.
- Moreover, install the latest USB drivers on your PC.
Method 1: Using 15 seconds ADB Installer
Developed by Snoop05, this is an all in one ADB installer tool for Android. As its name suggests, this tool installs ADB, Fastboot, and Google drivers on your computer within 15 seconds. All you need to do is launch this tool on your PC and follow the instructions given.
15 seconds ADB Installer.
Steps to install ADB Drivers
- Download and extract 15 seconds ADB Installer on your PC.
- Launch the 15 seconds ADB Installer.
- To install ADB and Fastboot, type Y and press enter key.
- Then to install ADB System-wide, again type Y and press enter.
- Now it’ll ask to install device drivers. Again type Y and press enter.
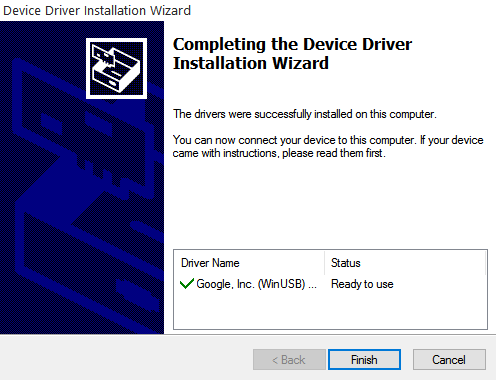
- This will launch the Device driver installation wizard. Press next to install the device drivers.
- That’s it! You’ve successfully installed ADB drivers using 15 seconds ADB Installer.
Method 2: Using Minimal ADB and Fastboot Setup wizard
Shimp208, a recognized contributor from XDA developers has compiled this setup wizard. Its main purpose is to install ADB drivers without having to enter any keys like in the previous method. Besides, the total installation of Minimal ADB and Fastboot is around 2 MB in size, thus making it very lightweight.
Steps to install ADB Drivers
- Download and Extract Minimal ADB and Fastboot Tool on your PC.
- Launch it by giving Administrator privileges.
- The installation Setup wizard will open as given below.
- Read out the instructions and click Next to continue.
- Furthermore, click on the Install option to begin the installation process.
- As soon as you click on Install, the Minimal ADB and Fastboot installation process will start.
- Finally, the Minimal ADB and Fastboot drivers will be successfully installed on your computer.
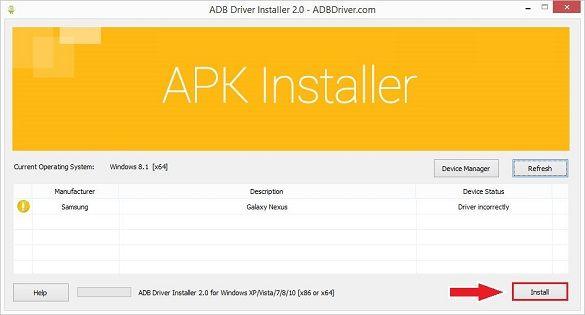
Method 3: Using ADB Driver Installer
ADB Driver Installer provides Universal Android ADB USB compatible drivers for Windows operating system.
Steps to install ADB Drivers
- Download and Extract ADB Driver Installer on your computer.
- Then right-click and run it as Administrator.
- Ensure that your Android device is connected to PC with USB debugging enabled.
- As soon as you launch the ADB Driver Installer, the following screen will appear:

- The device status shows that the drivers are incorrectly installed. So we need to fix this.
- For that click on the Install option. This will begin the installation of ADB and Fastboot drivers on your PC.
If you are prompted Windows can’t verify the publisher of this driver software, select Install this driver software anyway option.
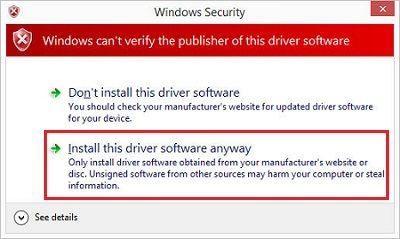
- This will start the installation of the Universal Android USB driver.
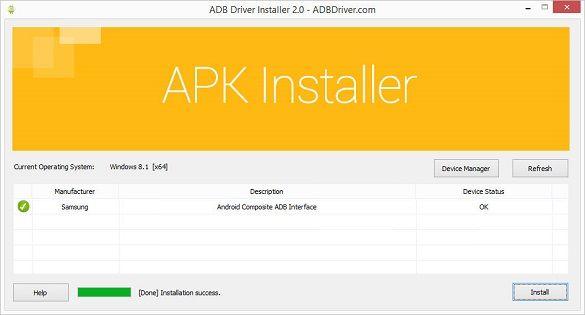
- Finally, the installation will complete a successful message.
Steps to install ADB Drivers
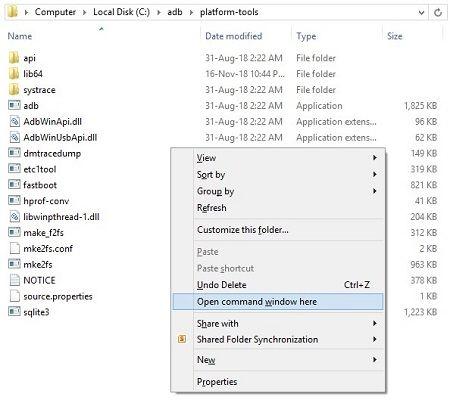
- Download and Extract the SDK Platform-tools zip file on your PC.
- After extraction, you’ll see a folder named Platform tools.
- Move this folder to an easily accessible folder such as C:\adb.
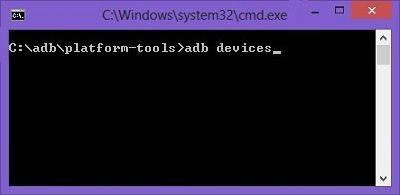
- In that folder, open a cmd window.
- For doing so, hold the Shift button and right mouse click anywhere in that folder. You’ll see a list of options from which select Open command window here option. This will launch the command prompt window as given below.

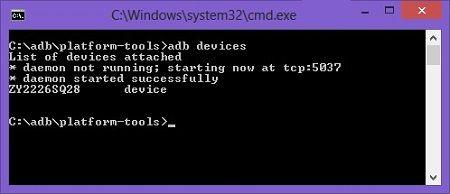
To confirm the proper installation of ADB drivers, type the following command, and press enter key.
- As soon as you press enter key, you’ll see a message saying ‘List of devices attached’ along with some random numbers.
- Moreover, this will confirm the successful connection of your device with PC using ADB drivers.
Note: If such a thing doesn’t happen, then install USB drivers, enable USB debugging mode, and try again. If the problem persists, try changing USB cable or even the USB port.
What is ADB and Fastboot?
These are the tools that are used to send terminal commands to an Android device from a command line on PC. Besides, when your phone is connected with active USB debugging, you can issue commands and communicate with the phone using your computer. Moreover, it generally works when an Android phone is switched on and booted into recovery.
Whereas Fastboot is a tool that works in bootloader mode and allows you to re-flash system partitions on Android phones. Most importantly, the installation of 15 seconds ADB installer is quite easy. All you have to do is extract the setup file on your PC. Then open the tool and follow the given step by step instructions. Furthermore, this is an all in one ADB installer which successfully installs the latest ADB drivers, fast boot drivers, and Google USB drivers. The actual size of this ADB installer is just 9 MB. However, it still supports all variants of Android smartphones and tablets.
Changelog
- Updated ADB and fast boot to API 23 version
- Updated Google USB Driver
- Errorlog and Cleanup
- Reduced size
- Newer DPInst
- Fixed bug refusing to set %PATH%
Additionally, the setup of ADB and Fastboot on the Windows operating system can be tricky sometimes. But all thanks to Snoop05, a recognized member from the XDA community who has developed this tool. Because of which it has become very easy to install ADB, Fastboot as well as Google USB drivers on your PC. Go through our step by step guide to install ADB and fast boot drivers using the 15 seconds ADB installer.
Requirements
- Connect your Android phone to PC using a USB cable.
- Enable USB Debugging mode in your phone settings.
- Install the necessary mobile USB drivers on your computer.
What is ADB?
Android Debug Bridge or ADB is a client-server program that lets you communicate with a device. ADB is a part of the Android Software Development Kit (SDK). Moreover, it includes three components viz. a client, a server, and a daemon. Besides, a client is the one who runs on your development machine and sends a command.
On the other hand, a daemon is the one that runs as a background process on your android device. And lastly, the communication between the client and daemon is managed by a Server. This communication is most often done over a USB cable, but WiFi connections are also supported. ADB can control your Android device over USB from a computer, transfer files, install apps, uninstall apps, run powerful shell commands, etc.
As long as debugging mode is enabled on your Android device, you can send ADB commands from a computer. Most important, the ADB commands can even work when your Android device is booted into recovery mode. Moreover, the best part is that your device doesn’t even need to be rooted in the ADB commands to work.