Ultravnc
Содержание:
- Upgrading to VNC Connect from legacy versions
- F8 Menu Functions
- Шифрование передачи данных
- Connecting to a VNC Server
- Программа для управления телефоном Андроид через компьютер.
- Installing without administrative privileges
- Encodings
- VNCViewer Context Menu
- Configuring VNC Viewer
- Connecting using .vnc files
- Access remote desktops with this app
- Additional Hotkeys
- Quick options
- Setting up the environment
- Управление телефоном с компьютера через VNC.
Upgrading to VNC Connect from legacy versions
If you are upgrading from VNC 5.x and have a valid Personal or Enterprise license key, installation should be seamless. You do not need to stop VNC Server, and any configuration changes you have made will be preserved. If you wish to enable cloud connectivity, perform this post-install step.
If you have an out-of-date Personal or Enterprise license key for VNC 5.x, you must purchase a subscription as a new customer.
If you have a Free license key for VNC 5.x, you can migrate to a new, free Home subscription providing you install VNC Server desk-side. You cannot migrate over a remote control session.
F8 Menu Functions
The F8 Menu provides the same set of available functions as the
VNC Viewer window’s normal System Menu, namely those allowing the window
to be minimized, maximized, moved or closed.
Additionally, some VNC-specific actions are available:
Full screen
The Full screen menu item allows full-screen mode to be toggled
on or off directly, without having to use the Options dialog. See the
description of the Full screen setting in the Options page for more
information.
Ctrl & Alt
Certain combinations of keys pressed with Ctrl and/or Alt are
intercepted locally by Windows, preventing them from being passed to the
server by VNC Viewer. The Ctrl and Alt menu options allow the Ctrl and
Alt keys to be pressed or released at the server, regardless of the
state of the VNC Viewer’s local keyboard. If an item is ticked then the
key is down (pressed), otherwise it is up (released).
Send F8
Because by default the F8 key is used to access the F8 menu, it
will not be sent to the VNC Server when it is pressed. To send an F8
keypress to the server, you can bring up the F8 Menu locally and select
the Send F8 menu option. If a menu key other than F8 has been selected
then this menu item will behave accordingly.
Send Ctrl-Alt-Del
The Ctrl-Alt-Del key sequence is intercepted by the operating
system for use as a Secure Access Sequence and so cannot be captured by
the VNC Viewer for transmission to a remote server. Instead, you can
bring up the F8 Menu and select Send Ctrl-Alt-Del to achieve the same
effect.
Note that on some versions of the operating system, pressing Alt
Gr-Del will cause the Ctrl-Alt-Del sequence to be captured by VNC Viewer
without the operating system intercepting it. This is available
primarily on European versions of the operating system.
Note that on all versions tested, pressing Shift-Ctrl-Alt-Del
could be used to cause Ctrl-Alt-Del to be received by a WinVNC Server
without having the local operating system capture the it.
Refresh Screen
The Refresh Screen option causes VNC Viewer to request a fresh
copy of the current state of the entire server desktop. This is useful
with VNC Servers that use imperfect update hooking schemes.
New Connection…
The New Connection… option causes a new Connection Details
dialog to be displayed, so that a connection can easily be made to
another VNC Server.
Note that a VNC Viewer started in this way actually shares the
same process as the VNC Viewer window from which it was started. The VNC
Viewer process will not quit until both windows have been
closed. This may affect the behaviour of scripts which launch VNC
Viewer.
Options…
This causes the Connection Options dialog to be displayed,
allowing the settings for the current connection to be
modified. See the description of VNC Viewer Options for more details.
Шифрование передачи данных
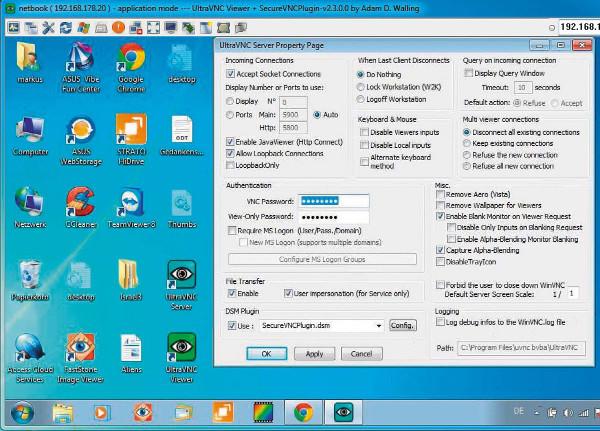
Шифрование передачи данных осуществляется с помощью вспомогательного ПО — UltraVNC. Так как сама утилита не может предложить шифрование, надо добавить эту функцию при помощи определённого плагина:
- сперва необходимо выполнить копирование SecureVNCPlugin.dsm в путь C:\Program Files\uvnc bvba\UltraVNC;
- затем следует при помощи правой кнопочки мышки нажать на ярлык утилиты в панели задач, кликнуть на Admin Properties;
- под строчкой DSM Plugin необходимо установить флажочек перед Use, затем следует выбрать расширение SecureVNC из предложенного, выполнить подтверждение своего решения, нажав на пункт Apply | OK.
Если же на PC установлена утилита Viewer, нужно выполнить копирование SecureVNCPlugin.dsm в путь C:\Program Files\UltraVNC. Сначала включается сама утилита, далее выполняется активация такой опции, как Use DSM Plugin. Потом надо выбрать расширение из предоставленного, выполнить установку соединения с сервером. После перечисленных действий с информационной базой, связанной с подключением и иными процессами, будет выполнена зашифровка.
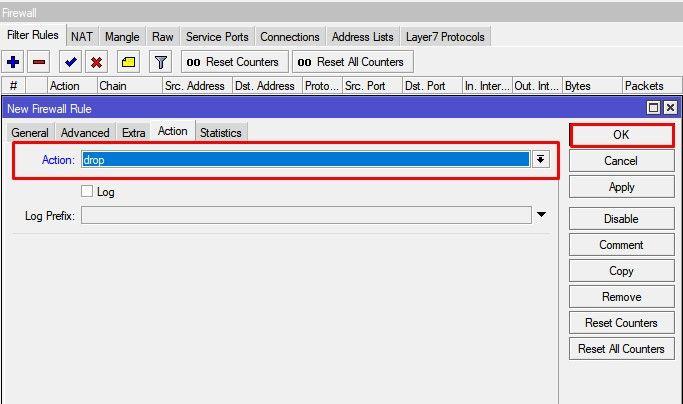
Возможно, произойдёт такое, что защитник Windows обнаружит трафик данных, который создала утилита, и вскоре решит заблокировать её. Чтобы это исправить, надо нажать на пункт «Разрешить доступ». Это следует сделать, чтобы продолжить удалённую работу. Чтобы увеличить скорость утилиты, необходимо повысить скорость самого соединения, для этого следует выполнить отмену компрессии пакетов данных.
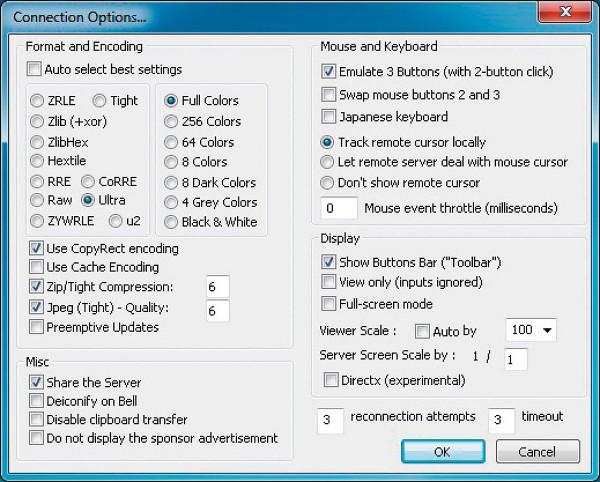
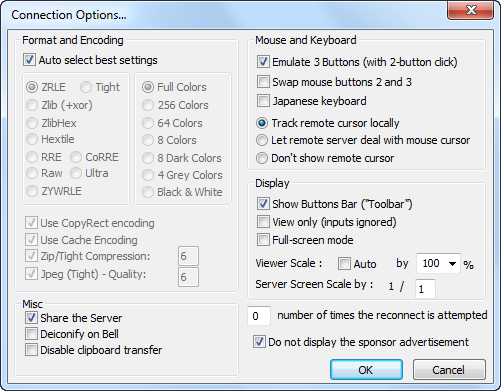
Чтобы проделать такую операцию, надо в главном меню приложения нажать на пункт Options, снять флажочек перед надписью Auto select best settings. Затем нужно выбрать предоставленный пункт Ulta, выполнить активацию такой опции, как Use CopyRectencoding, Zip/tight Compression и Jpeg — Quality. После чего остается нажать на пункт OK, на всплывшем окне следует выполнить подтверждение сохранения установленных настроек, нажав на строчку Connect.
Connecting to a VNC Server
If installed by the WinVNC setup package then VNC Viewer is
accessible from the Start Menu.
If downloaded directly, the VNC Viewer can be run either by
double-clicking on the program icon, or from the command-line.
The VNC Viewer will present the Connection Details dialog,
allowing the IP address or name of the target VNC Server to be
specified.

If the VNC server’s Display Number is non-zero then the display
number can be specified by adding a colon to the server’s IP address or
name, followed by the display number:
If the VNC server is using a non-standard port number to accept
connections then this is specified by adding two colons to the
server’s address or name, followed by the port number:
Once you have selected the VNC server to connect to, you can
simply click Ok or press return to attempt to connect to it. If your
connection attempt succeeds then the server’s details will be added to
the Connection Details drop-down menu, to save you typing next time.
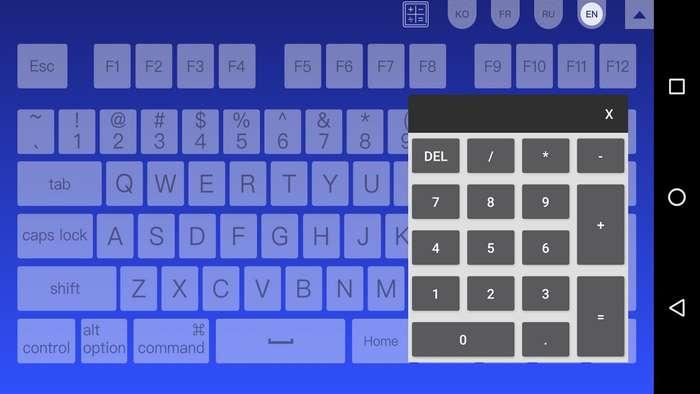
Программа для управления телефоном Андроид через компьютер.
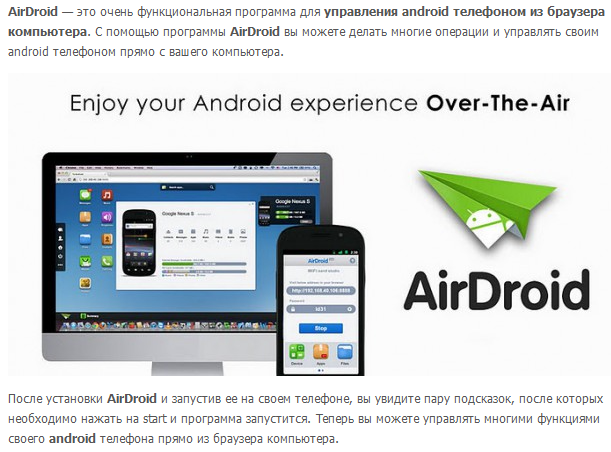
Программа для управления телефоном Андроид через компьютер
— описание и возможности программы AirDroid управления телефоном через компьютер. Данная программа устанавливается на телефон с ОС Android. Далее приложение сгенерирует пароль и даст http адрес, через который можно зайти в телефон используя браузер компьютера, планшета или ноутбука. Приложение AirDroid может: показывать свободную память, заряд батареи, оперативную память и загрузку процессора, уровень приема сигнала WiFi и GSM. AirDroid имеет свои менеджер приложений и файлов карты памяти, которые позволяют делать множество необходимых операций. Также есть свой таск менеджер с функцией завершения задачи, показывающий загруженные приложения, количество занимаемой памяти по каждой программе. В браузере ПК можно создать новое сообщение, новый контакт. У программы для управления телефоном очень качественный и красивый интерфейс как в телефоне так и на компьютере. Очень много положительных отзывов от пользователей. Приложение AirDroid бесплатное.
Installing without administrative privileges
You can install without administrative privileges but please note not all programs or features will be available:
- Available programs: VNC Server in User Mode (), Virtual Mode (), and VNC Viewer.
- Unavailable programs: VNC Server in Service Mode () and the Virtual Mode daemon ().
- Unavailable features: Printing and the single sign-on (SSO) authentication scheme.
- Restricted features: The system authentication scheme is available, but connecting users must supply the credentials of the process owner (that is, the user starting VNC Server) in order to connect. The credentials of other system users added to the VNC Server Permissions parameter are ignored.
To do this:
Encodings
This section (except Ultra encoding) is taken fromTightVNC’svncviewer man page.
The server supplies information in whatever format is desiredby the client, in order to make the client as easy as possible toimplement. If the client represents itself as able to usemultiple formats, the server will choose one.
Pixel format refers to the representation of anindividual pixel. The most common formats are 24 and 16 bit»true-color» values, and 8-bit «color map» representations, wherean arbitrary map converts the color number to RGB values.
Encoding refers to how a rectangle of pixels are sent(all pixel information in VNC is sent as rectangles). Allrectangles come with a header giving the location and size of therectangle and an encoding type used by the data which follows.These types are listed below.
Raw
The raw encoding simply sends width*height pixel values. Allclients are required to support this encoding type. Raw is alsothe fastest when the server and viewer are on the same machine,as the connection speed is essentially infinite and raw encodingminimizes processing time.
CopyRect
The Copy Rectangle encoding is efficient when something isbeing moved; the only data sent is the location of a rectanglefrom which data should be copied to the current location.Copyrect could also be used to efficiently transmit a repeatedpattern.
RRE
The Rise-and-Run-length-Encoding is basically a 2D version ofrun-length encoding (RLE). In this encoding, a sequence ofidentical pixels are compressed to a single value and repeatcount. In VNC, this is implemented with a background color, andthen specifications of an arbitrary number of sub rectangles andcolor for each. This is an efficient encoding for large blocks ofconstant color.
CoRRE
This is a minor variation on RRE, using a maximum of 255x255pixel rectangles. This allows for single-byte values to be used,reducing packet size. This is in general more efficient, becausethe savings from sending 1-byte values generally outweighs thelosses from the (relatively rare) cases where very large regionsare painted the same color.
Hextile
Here, rectangles are split up in to 16×16 tiles, which aresent in a predetermined order. The data within the tiles is senteither raw or as a variant on RRE. Hextile encoding is usuallythe best choice for using in high-speed network environments(e.g. Ethernet local-area networks).
Zlib
Zlib is a very simple encoding that uses zlib library tocompress raw pixel data. This encoding achieves good compression,but consumes a lot of CPU time. Support for this encoding isprovided for compatibility with VNC servers that might notunderstand Tight encoding which is more efficient than Zlib innearly all real-life situations.
Tight
Like Zlib encoding, Tight encoding uses zlib library tocompress the pixel data, but it pre-processes data to maximizecompression ratios, and to minimize CPU usage on compression.Also, JPEG compression may be used to encode color-rich screenareas (see the description of -quality and -nojpeg optionsabove). Tight encoding is usually the best choice forlow-bandwidth network environments (e.g. slow modemconnections).
Ultra
Experimental, Ultra encoding provides real time performanceover a LAN by utilizing LZO compression. LZO is a datacompression scheme which is suitable for data de-/compression inreal-time. This means it favors speed over compressionratio.
VNCViewer Context Menu
File Transfer… (Hotkey )
Open the file transfer dialog window.
Chat… (Hotkey )
Open the chat dialog window.
Show/Hide Toolbar (Hotkey )
Show or hide the VNCViewer toolbar.
Disable/Enable Remote Input and Monitor
Disable keyboard and mouse input as well as the monitor onthe remote computer.
Connection options… (Hotkey )
Open the connection option dialog window.
Connection info
Open the connection info window.
Request screen refresh
Redraw the screen in VNCViewer. Sometimes the display inVNCViewer misses updates or becomes corrupted. A screen refreshcan then insure that VNCViewer’s display and remote computer’sdisplay are in sync.
View only
Disables sending mouse and keyboard events from the VNCViewerto the remote computer.
Various screen size options
Full screen mode (hotkey ) displays theremote screen on the entire screen of your display.Together with a hidden toolbar this feels like sitting in frontof the remote computer.Scaled viewer mode displays the scaled remote screen in a windowwith a user defined size.Scaled server mode generates less network traffic from serverside and uses a pixel blending algorithm to optimize thedisplay.Fuzzy screen mode combines Server and Viewer scaling to providereasonable visual comfort and speed even over very slowconnections.Auto scaling mode scales the view to fit the viewer screen.Normal screen mode (hotkey ) displays theremote screen 1:1.
Full/256 Colors
Change the color depth of the screen.
Send various key combinations
Send (hotkey), (this opens thestart menu), , , or .
New connection…
Start a new connection.
Save connection info as… (Hotkey)
Save the options and settings of the active connection in afile.
About VNC Viewer…
See version and licensing information of VNCViewer.
Configuring VNC Viewer
VNC Viewer provides a number of options allowing its behaviour to
be tailored to your needs. These are configured in one of three ways
listed below.
Changing the Default Options
VNC Viewer allows a set of options to be saved per-user, which
will be used as the defaults for all connections that user makes to VNC
Servers. The Default Options can be overridden from the Connection
Details dialog, before making a connection, or during a connection, or
by specifying the options to override on the VNC Viewer command-line.
While the VNC Viewer is running in listening mode, it
will place an icon in the system tray. Right-clicking on this icon will
cause a menu to be displayed, through which the Default Options may be
accessed. The Default Options are saved on a per-user basis, and are
used for all subsequent VNC connections.
Changing the Options for a New/Current Connection
The Options dialog can be access from the Connection Details
dialog, when making a new VNC connection, or from the F8 Menu of an
active connection. In either case, the dialog can be used to override
any settings configured through the Default Options dialog.
Connecting using .vnc files
VNC Viewer 4 supports loading and saving of .vnc files,
containing a set of connection options. Although the format of .vnc
files saved with VNC Viewer 4 differs from that used by VNC Viewer 3, it
is capable of loading both the old and new formats.
To use a connection options file from the command-line, simply
run VNC Viewer 4 with the -config command-line option, followed
by the .vnc filename.
e.g. vncviewer.exe -config
c:\home\jnw\vnc\my_home_machine.vnc
If you have installed VNC Viewer using the WinVNC setup package
then .vnc files will have been automatically registered, so that you can
simply double-click on one to have VNC Viewer open it.
Access remote desktops with this app
VNC Viewer is a remote PC software that allows users to instantly and remotely access any computer—be it a Windows PC, Linux machine, or a Mac. This app helps you view the remote computer’s desktop and control its keyboard and mouse. However, users need to first download a VNC server app to the computer they want to control and then download this app to the computer they wish to exercise control from.
What is VNC Viewer used for?
In computing, VNC—or «virtual network computing»—is a graphical desktop sharing system. This software uses the remote-frame buffer protocol to remotely control another computer. It transmits the keyboard and mouse events from one computer to another and relays the graphical-screen updates back in the other direction over a network. VNC is platform-independent—there are clients and servers for many GUI-based operating systems and Java.
Various clients may connect to a VNC server at the same time. The many uses for this technology include remote technical support and accessing files on one’s work computer from another from one’s home computer, and vice versa. More than allowing you to remotely control your computer, the app also has support for Bluetooth keyboards and mice.
It also backs up and syncs your connections between all your devices by signing in to the VNC Viewer on each one. VNC password-protects each remote computer out-of-the-box. You may need to enter the same username and password you use to log in to your computer. All sessions are then encrypted end-to-end to make sure that your data are safe from online snoopers.
How to install the app?
As noted, to use the app, you need to make sure that you have installed VNC Server on the computer you want to control. Then, you can install this app to the device you want to exercise the control from. To install the app, you just need to run the installer on the device you want to control. Note, however, that if you are connecting over the internet, you may need to configure your network. The app may also not work equally well on different computers.
There are optional MSIs available under Windows for remote deployment. If you don’t have permission to install the app on desktop platforms, you can choose to install the standalone option. VNC Viewer is always free to use; you only need to accept the EULA the first time you run.
Take your work anywhere
With VNC Viewer, you can now access your work computer using your home computer or vice versa. The app is very robust yet easy to use. It also provides good visualization, so it will be like working on your computer that is remotely located. Moreover, the connection is encrypted, giving you peace of mind that your data is safe. There are a few issues here and there, but overall, this app provides a solid solution to your remote access needs.
Additional Hotkeys
Pressing ALT or CTRL send ALT/CTRL directly to the VNCServer,as if the user selected «CTRL DOWN/CTRL UP/ALT DOWN/ALT UP» fromthe system menu.
When is activated, all keycombinations (except ) are directly sentto the remote computer:
-
Instead of switching applications on the client side, is sent to the VNCServer.
-
Instead of opening the start menu on the client side, is sent to the VNCServer.
-
Instead of opening the system menu on the client side, is sent to the VNCServer.
-
Pressing key toggles Full-Screenmode on or off.
-
Pressing key requests a full screenupdate (same as selecting «Request Screen Refresh» from thesystem menu)
Quick options
-
The quick options relate to the following configurationsettings:
Auto
LAN
Medium
Modem
Slow
Ultra
View OnlyNo keyboard or mouse events are sent from the viewer to theserver. The server screen can only be viewed, but notcontrolled.Auto scalingThe viewer window is automatically scaled to fit the size ofyour local screen.Use DSM PluginChoose a DSM (Data Stream Modification) Plugin and configureit.To use an encryption plugin, for instance, check this option andselect the plugin in the combo box. The plugin file must be inthe same directory than the vncviewer.exe program. And of course,the same plugin mustbe used by the UltraVNC server you connectto.Proxy/RepeaterSpecify the repeateraddress here.Save connection settings as defaultIf checked, the current settings are saved as default optionsin a configuration file. So next time you run the viewer, youdon’t have to reselect all your favorite settings.Further viewer configuration can be done when pressing the button.
Format and Encoding
See Encodings section below.Note: Grey colors only works with 32 bits color screenresolution. 16/24 bits color resolutions just don’t work withgrey colors.Mouse buttonsMouse cursorDisplayMiscellaneous
number of time the reconnect is attempted 0 (default), never reconnect9 (maximum) 9 time trying reconnect.gui reconnectnumber only for now.This is the number of times a reconnect is made before the viewer close the connection.
Setting up the environment
The following notes apply whichever procedure you have followed above.
VNC Server in Virtual Mode
For best results with modern desktop environments and applications on Red Hat-compatible computers, run VNC Server in conjunction with the system Xorg server, rather than the outdated version built-in to Xvnc.
For Ubuntu, you may need to change the desktop environment.
SELinux
automatically registers policy modules for RHEL/CentOS 5+ and Fedora distributions if SELinux is enabled on the system. If SELinux is disabled, or for any other distribution, you must subsequently run . Consult the tarball README for further information.
Управление телефоном с компьютера через VNC.
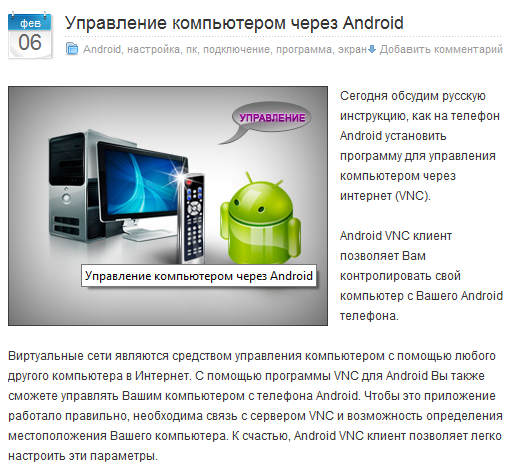
Управление телефоном с компьютера через VNC
— VNC server — Android VNC сервер, это более серьезная технология управления телефоном с компьютера. Эта программа основана на технологии VNC (виртуальные сети), которые являются средством управления компьютером при помощью другого компьютера через Интернет. В нашем случае это управление телефона с компьютера через интернет. Настроив VNC сервер на смартфоне, можно зайти на него с ПК через VNC клиент и управлять всеми режимами телефона, так как будто телефон находится у Вас в руках (см. видео). Ссылки на VNC server для телефона и на VNC Client для ПК не даю, найти программы можно на Андроид.Маркет и в поиске Яндекс соответственно. В приведенной ссылке на blogspot имеется описание о том как настроить VNC соединения телефона с компьютером.